Anyone working productively with Odoo should not test changes directly in the live instance. A test environment, often referred to as a dev environment, provides a solution here. In this article, we will show you why you need a test environment and how to create one yourself in Odoo Online in just a few steps.
What do I need a test environment for in Odoo Online?
Unlike a self-hosted Odoo or Odoo.sh, you cannot upload your own code or modules with Odoo Online. Nevertheless, a test environment is useful, especially for complex instances with a lot of data or when making customisations with Odoo Studio.
A test environment offers you two key advantages: it protects against data loss and ensures that ongoing operations are not disrupted. Changes can be tested risk-free before being implemented in the production environment.
Guide: Create a Test Environment in a Few Steps
1. Sign in to Odoo.com
Go to Odoo.com (not in your Odoo instance) and log in. The person who is responsible for communication and billing with Odoo must log in here.
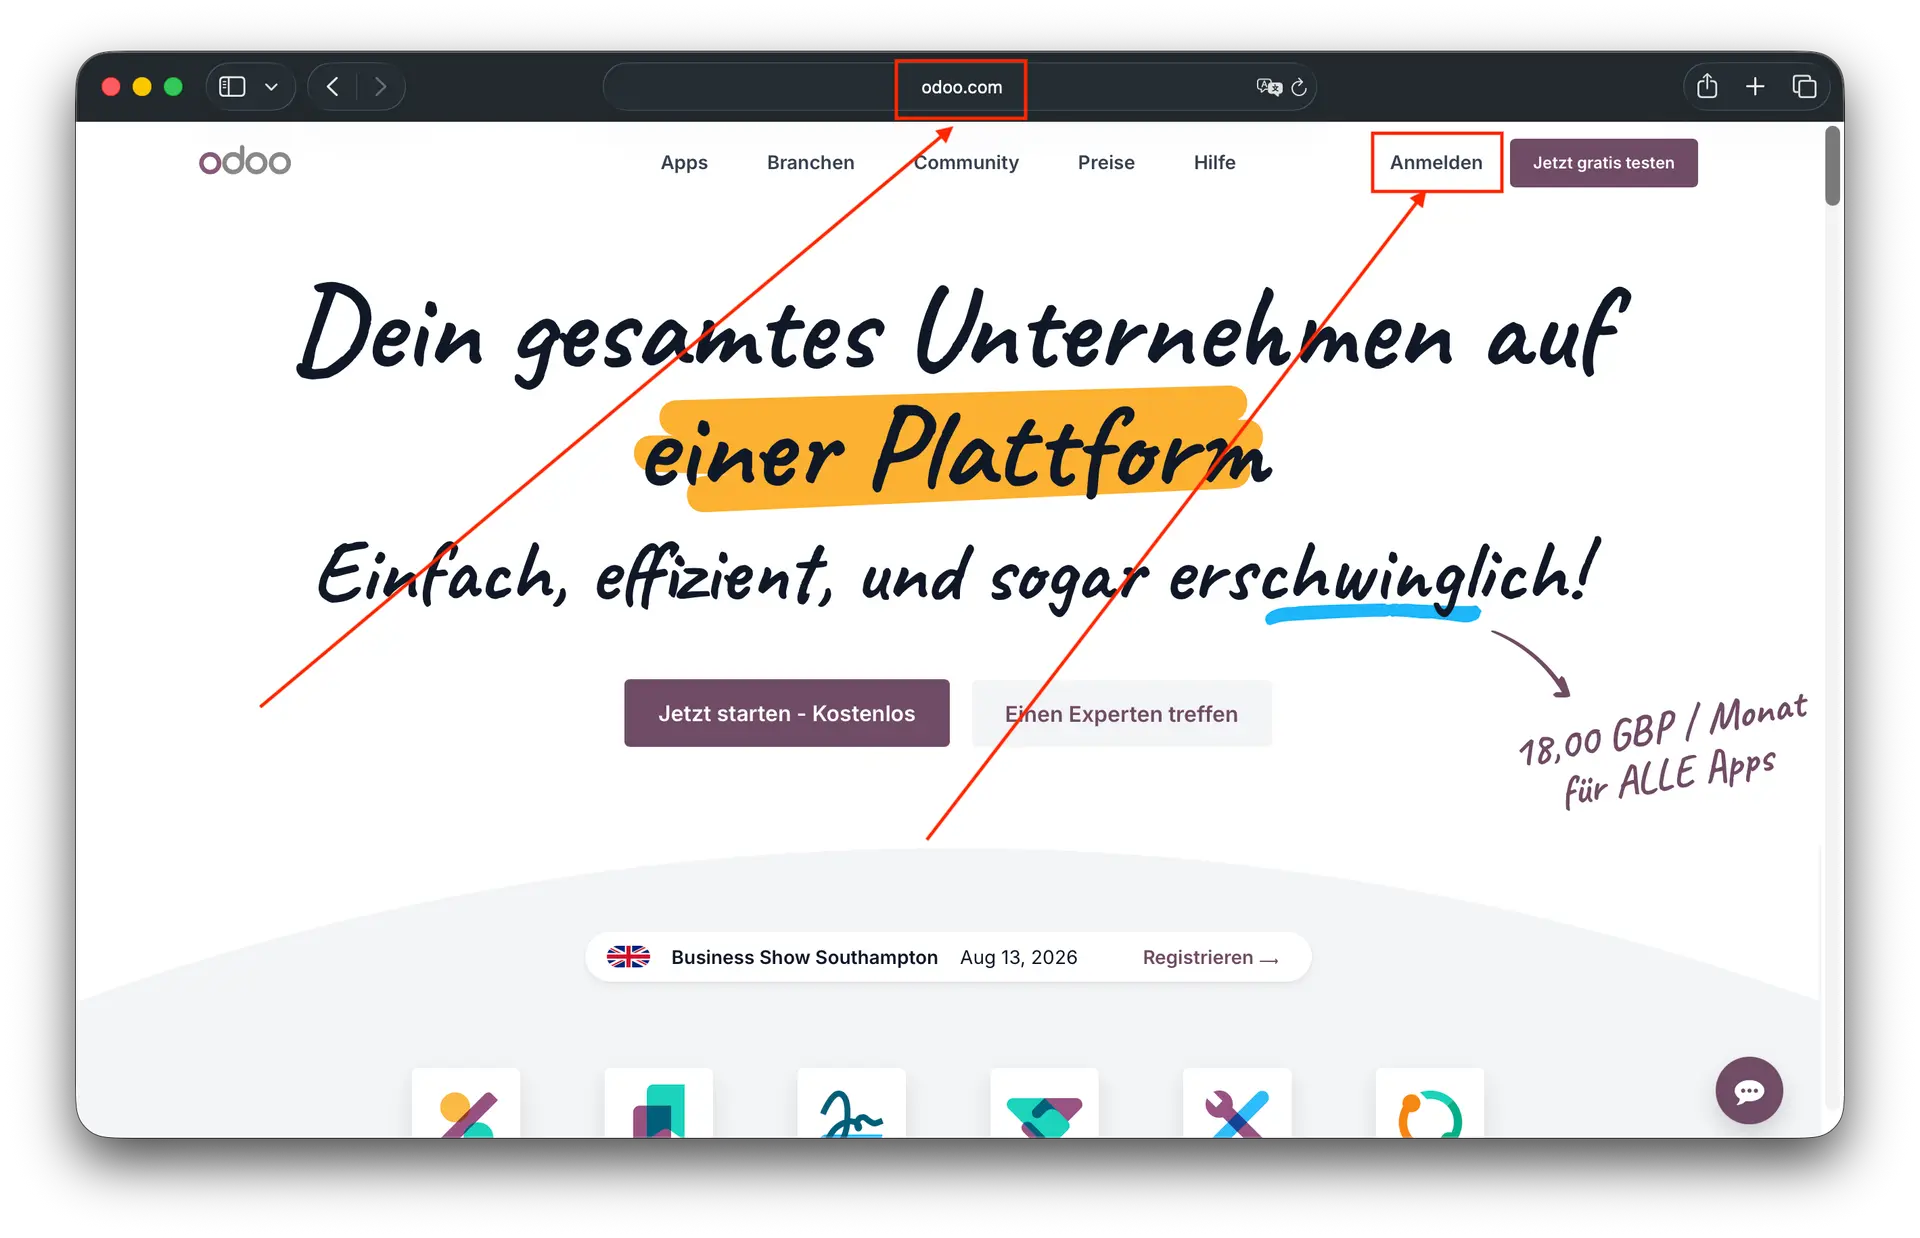 Screenshot: Odoo.com, Pfeil auf „Anmeldung“ rechts oben
2. Navigate to "My Databases"
Once you are logged in, a user icon will be displayed instead of the login button. Through this, you can access the "My Databases" option in a dropdown menu.
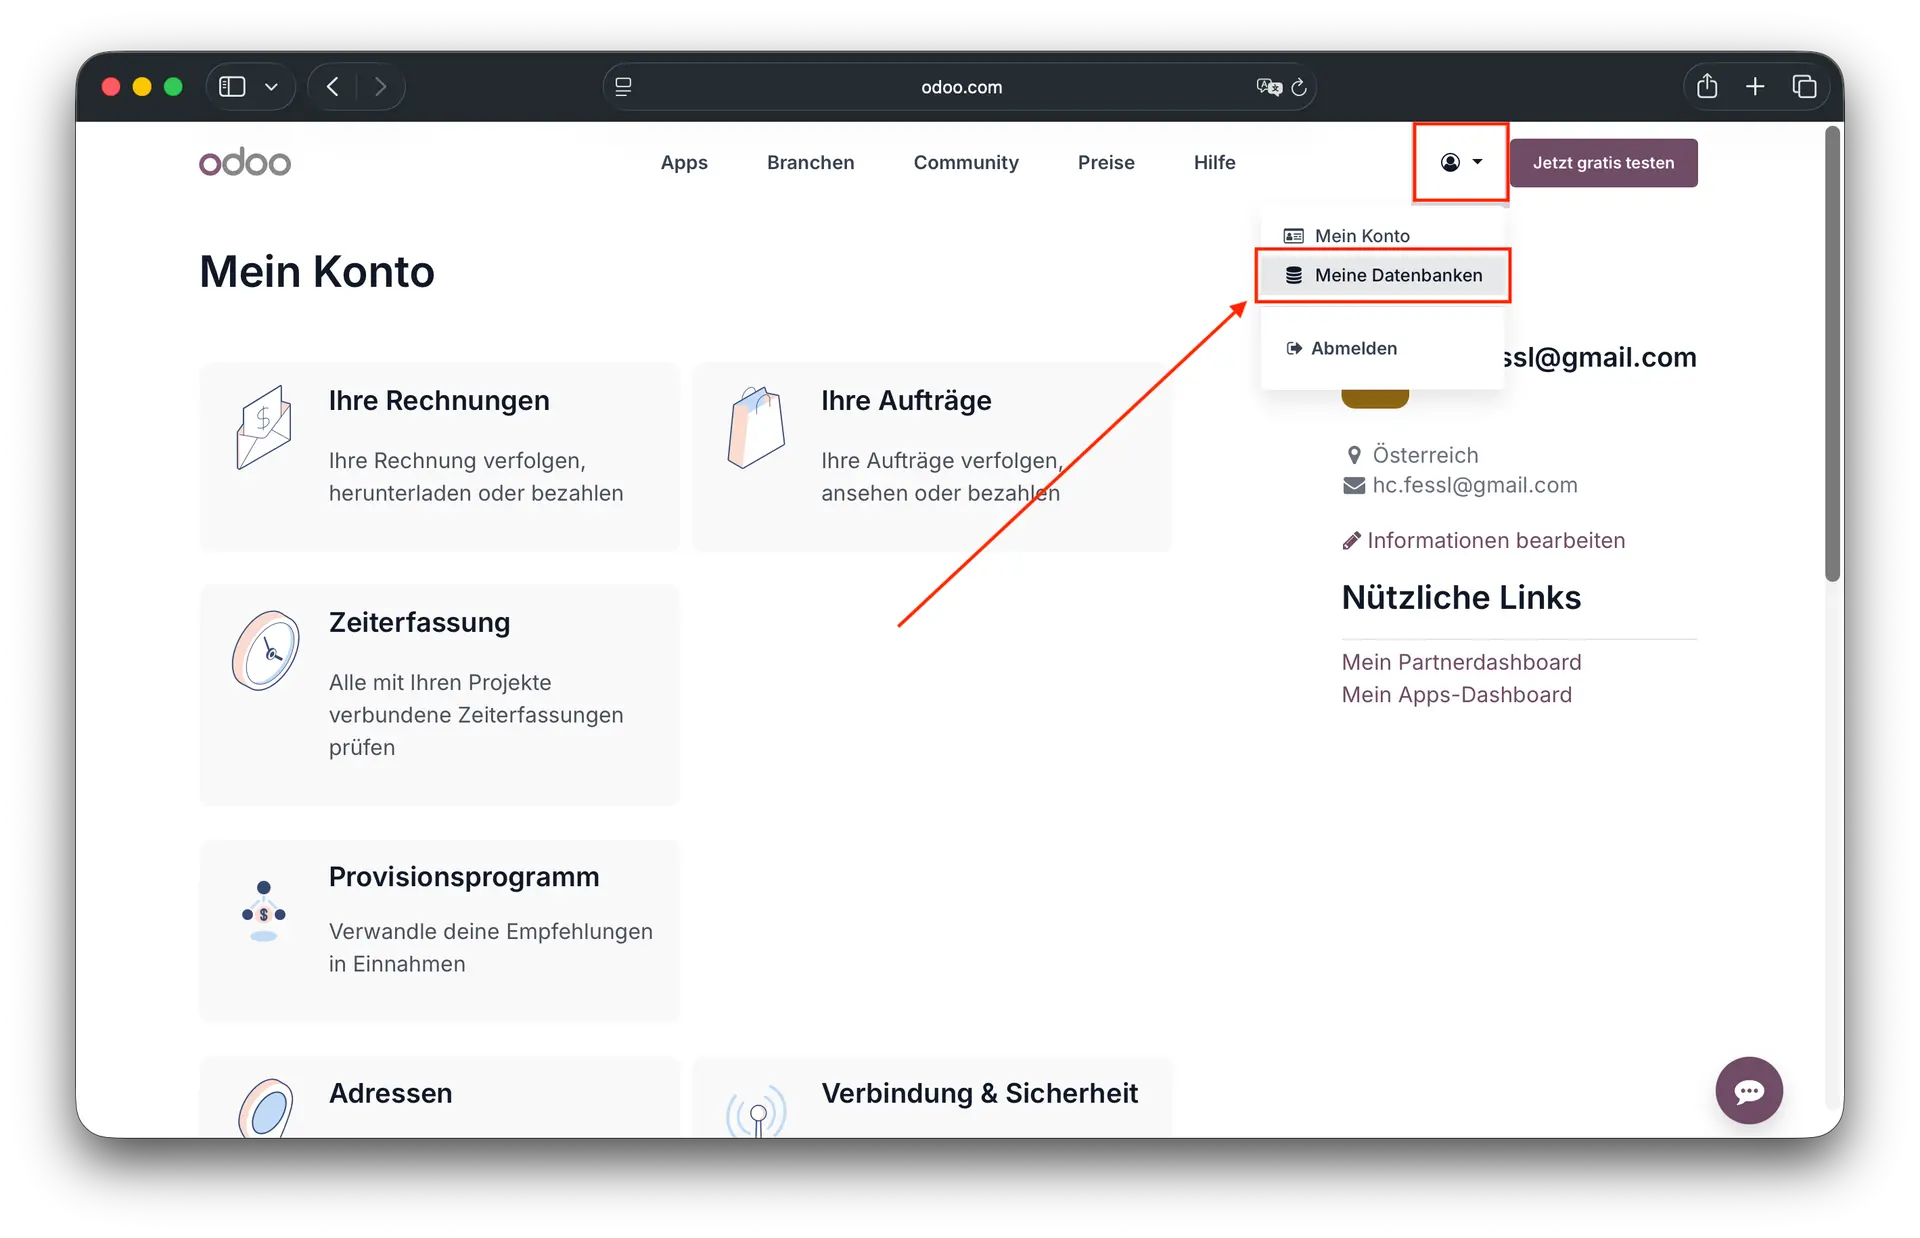 Screenshot: Dropdown with arrow on "My Databases"
3. Open database options
On this page, you will find all your active Odoo instances. Next to the name of each instance, there is a gear icon. If you click on it, you will receive more options for this database.
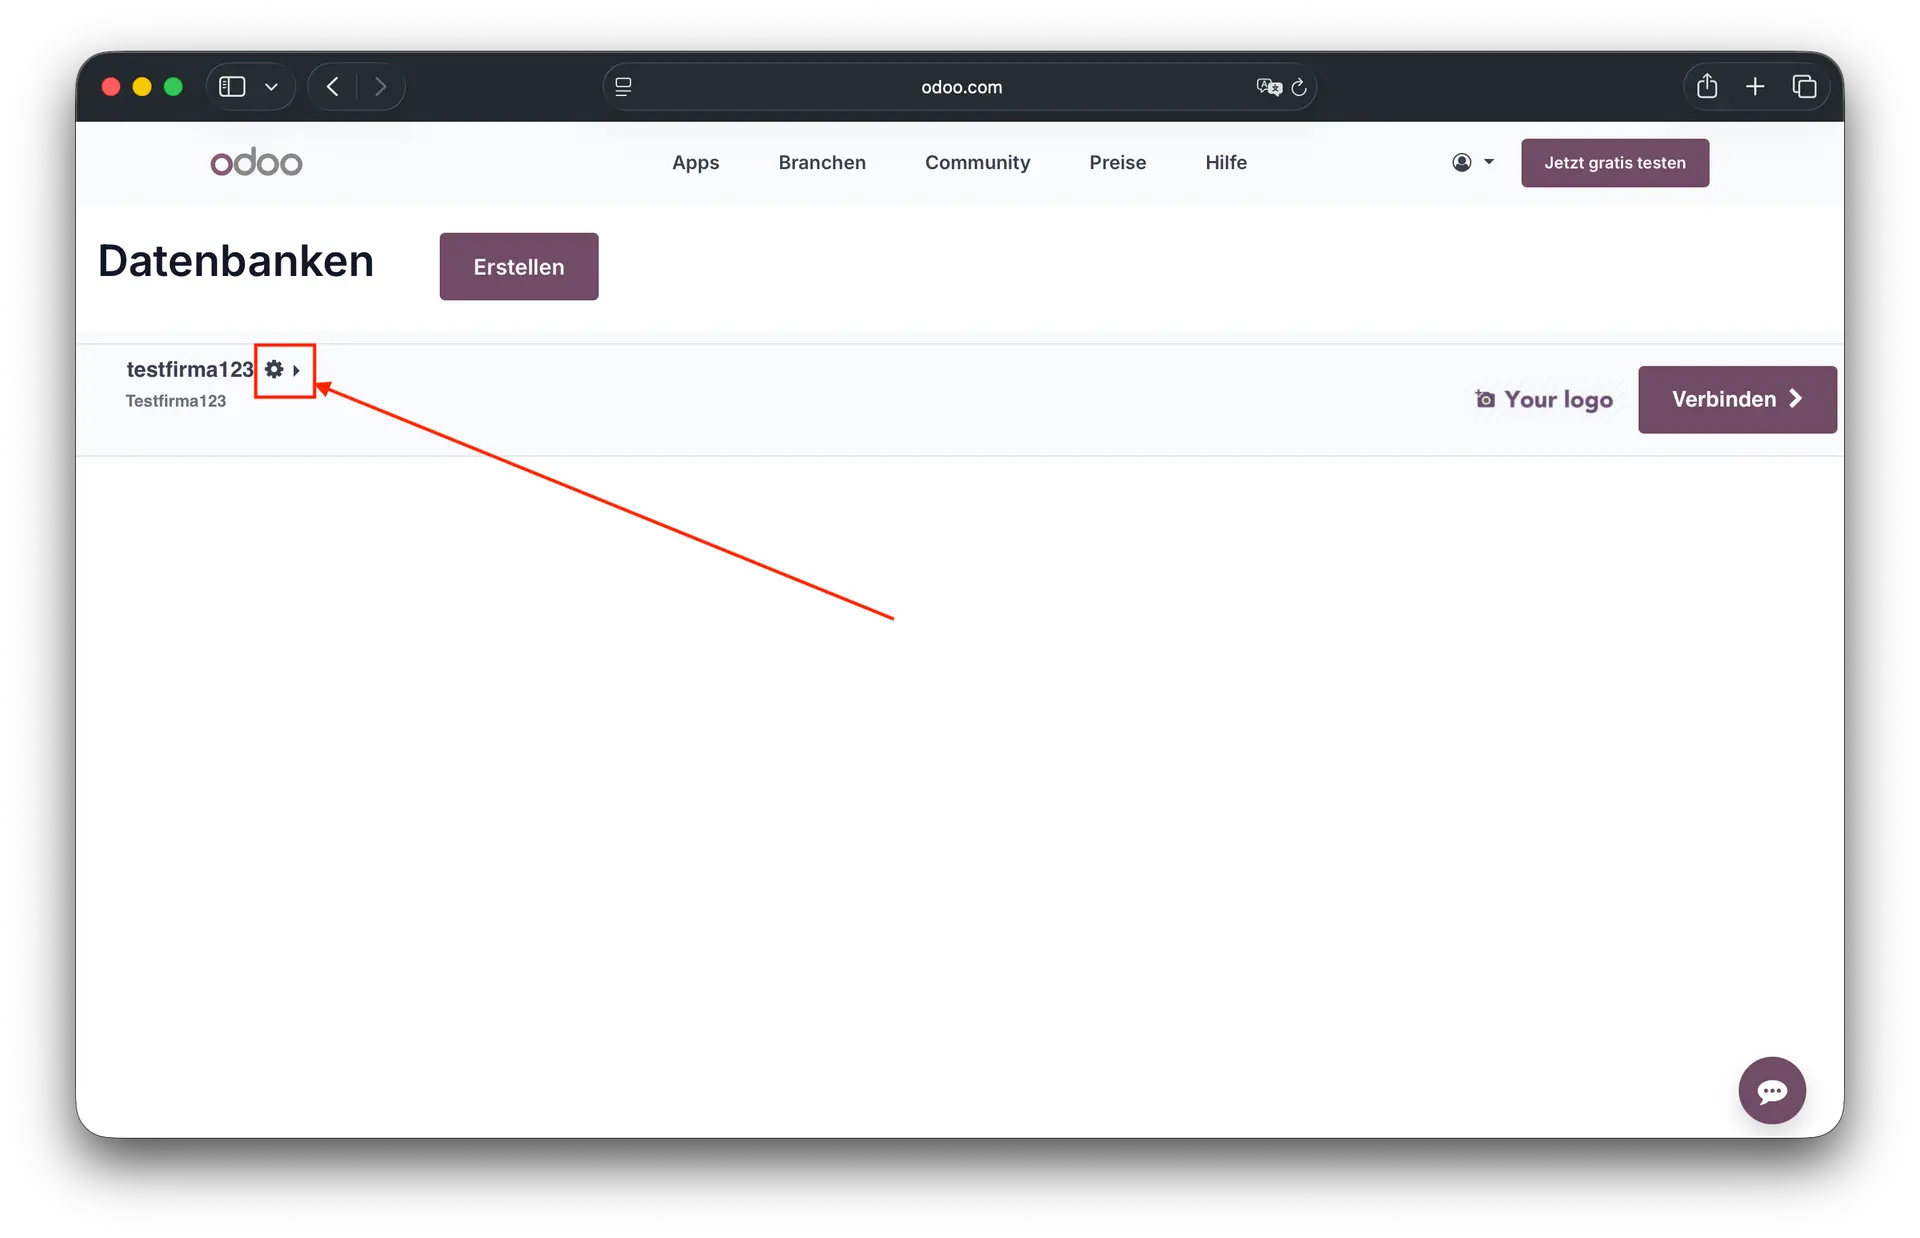 Screenshot: Arrow on gear
4. Select "Manage"
In the dropdown menu, select the option "Manage".
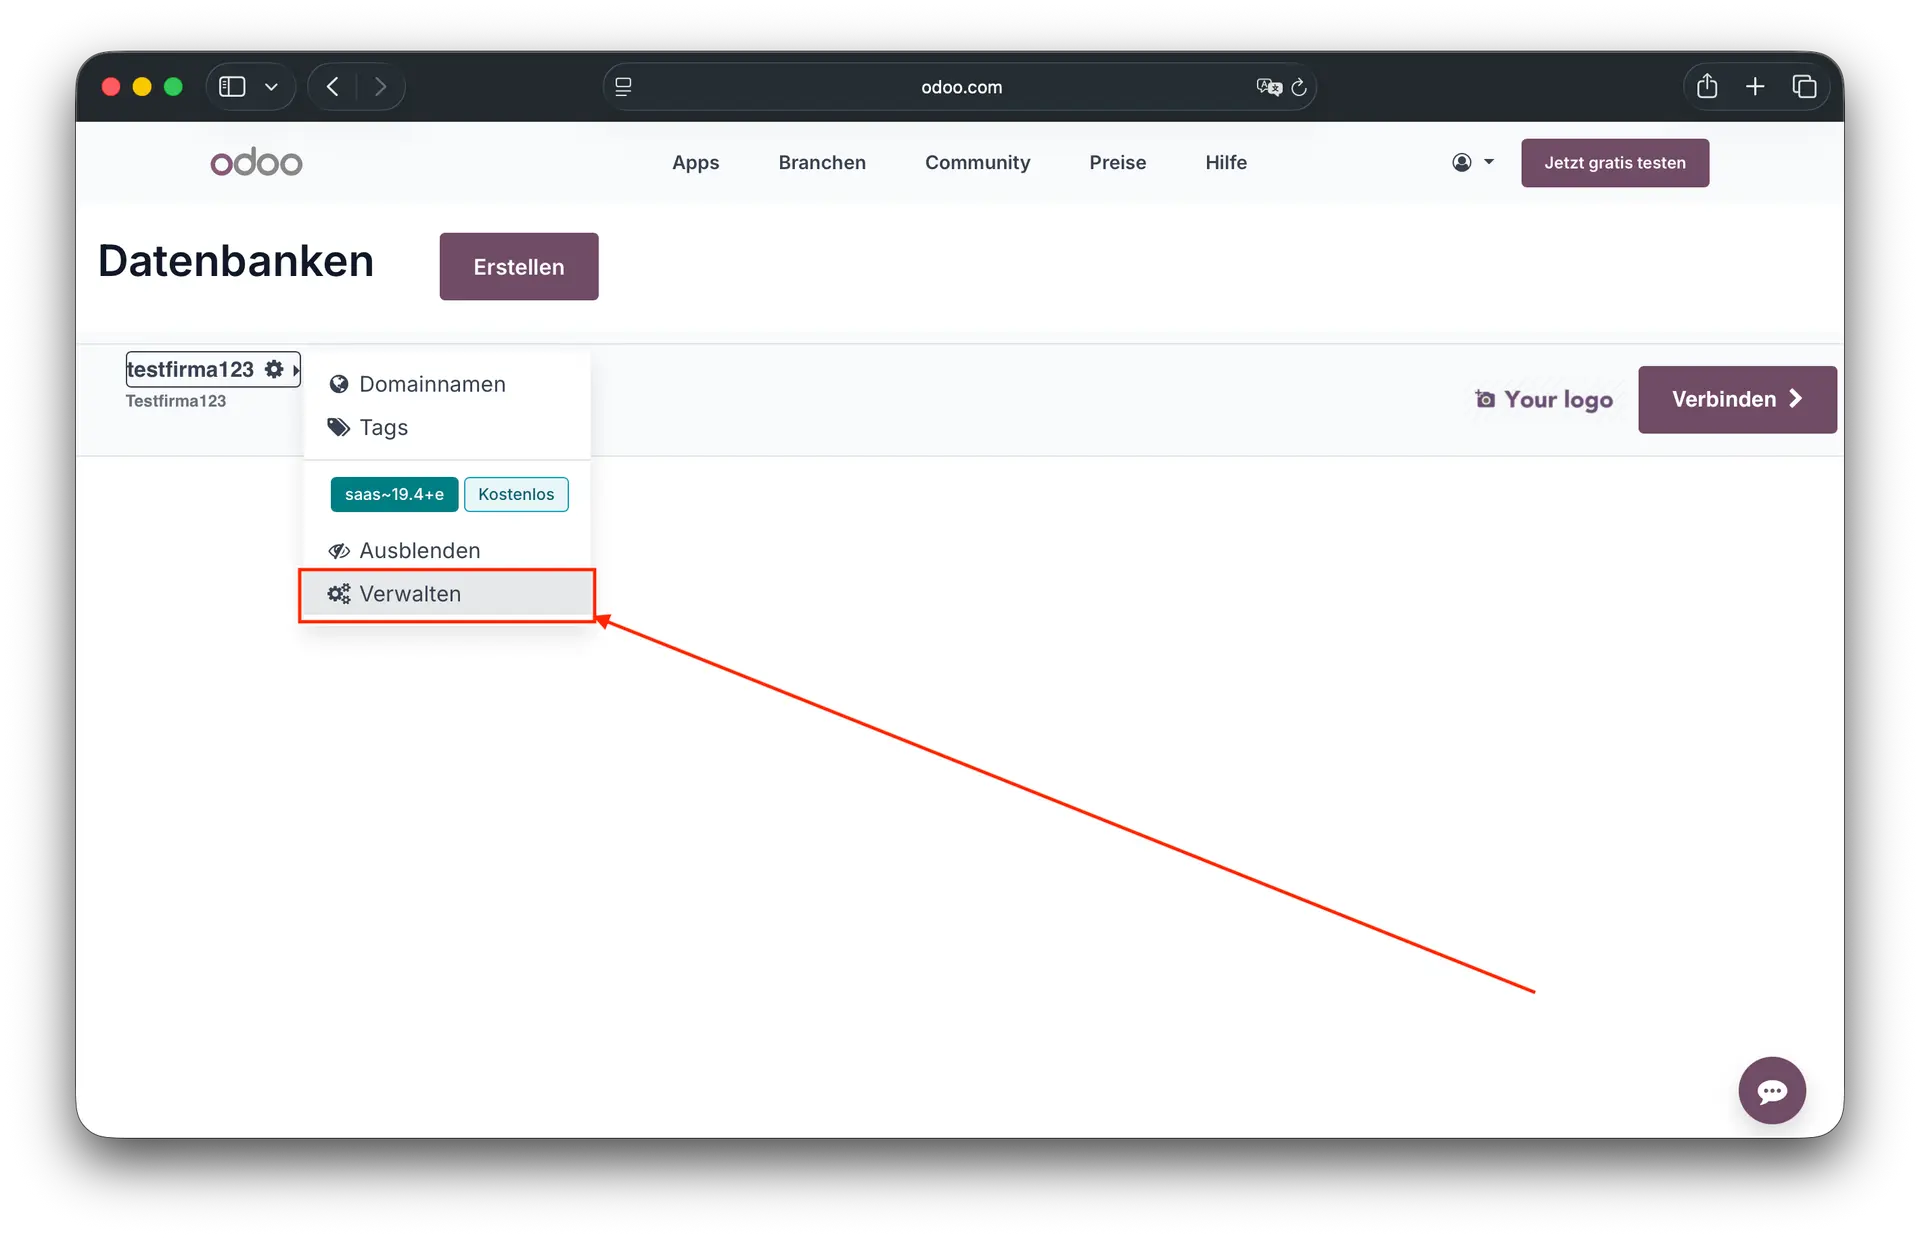 Screenshot: Arrow on "Manage"
5. Duplicate database
There you have the opportunity to duplicate the database. A test environment is free for 30 days. After that, a new one must be created.
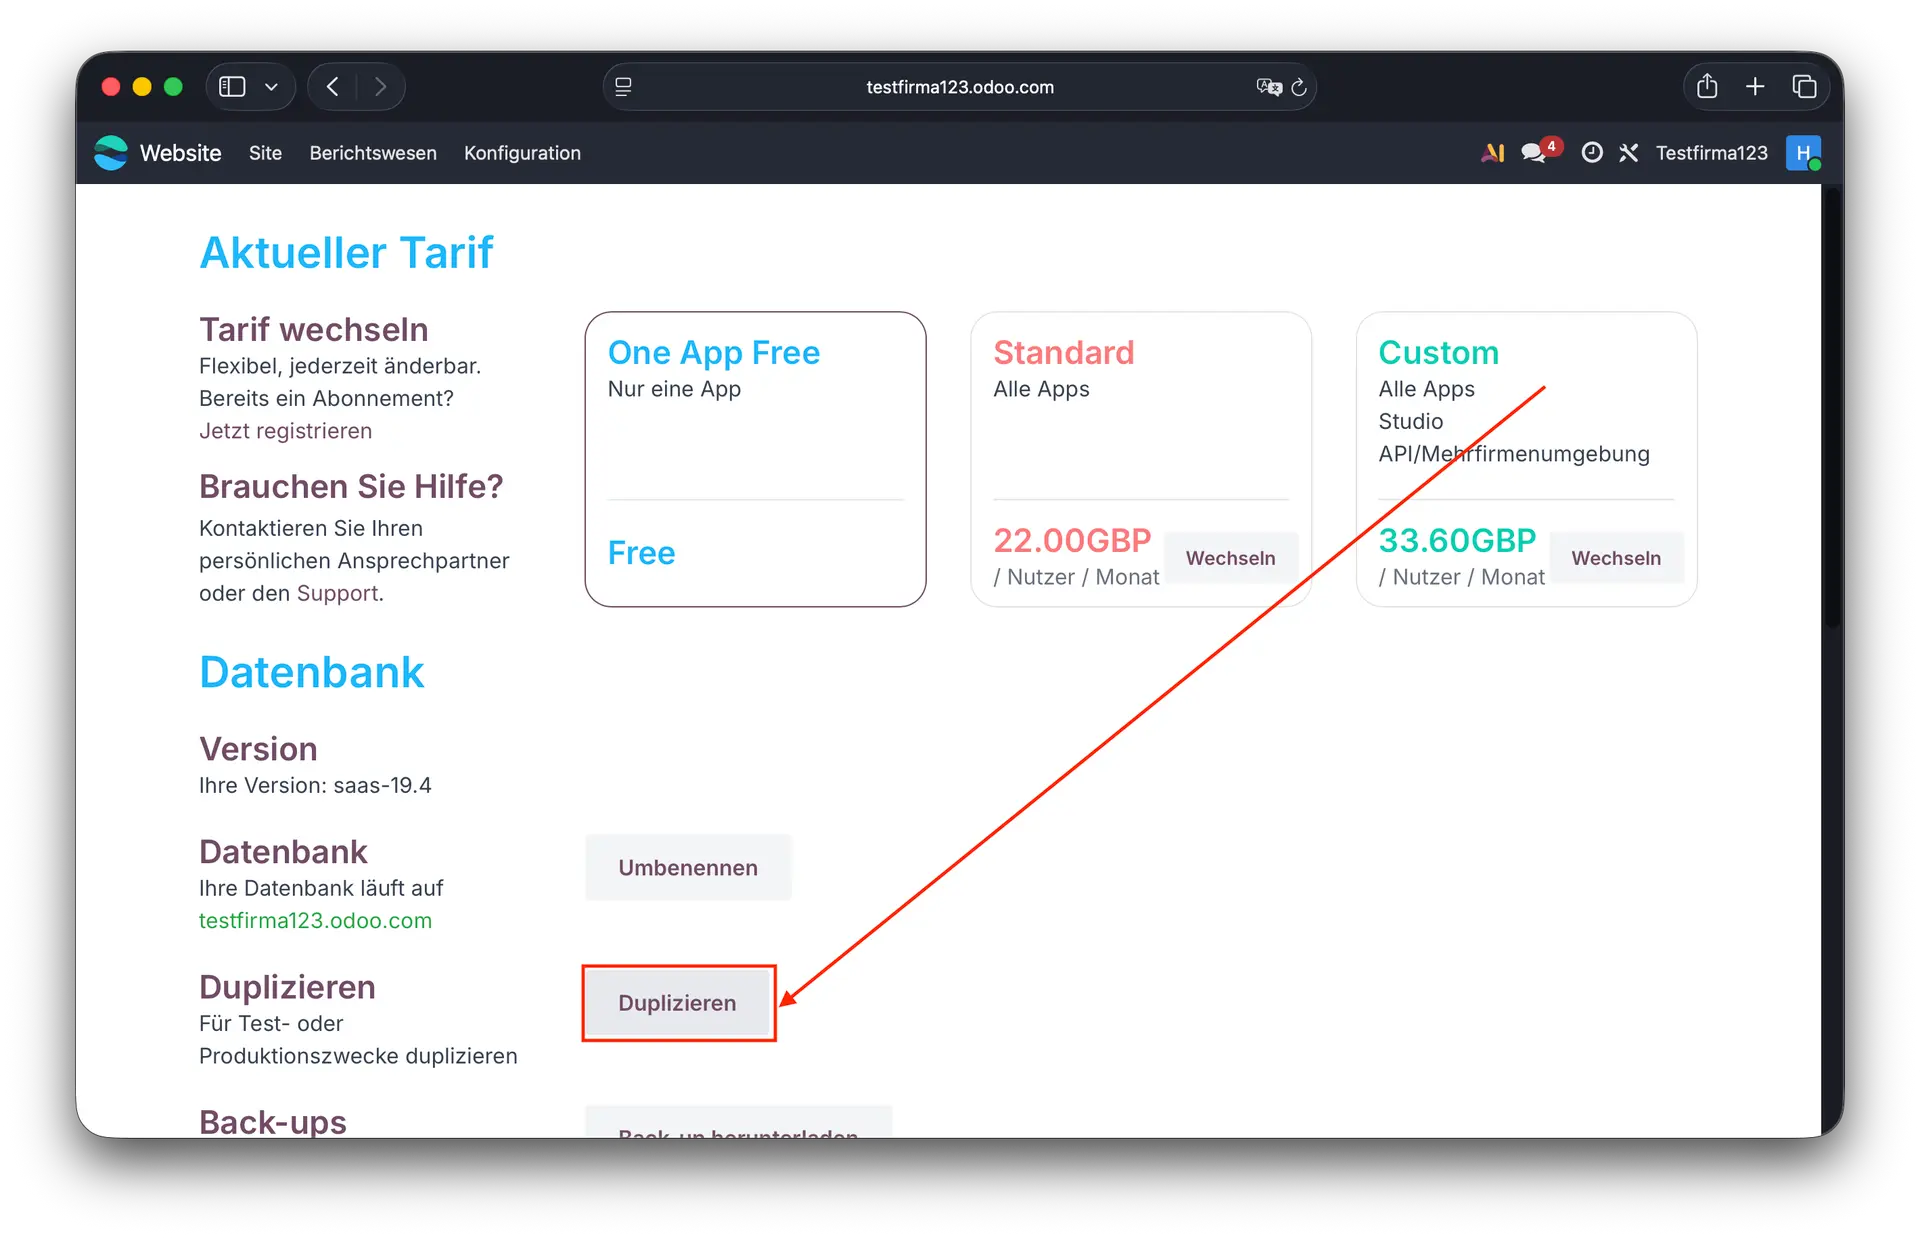 Screenshot: Arrow on "Duplicate"
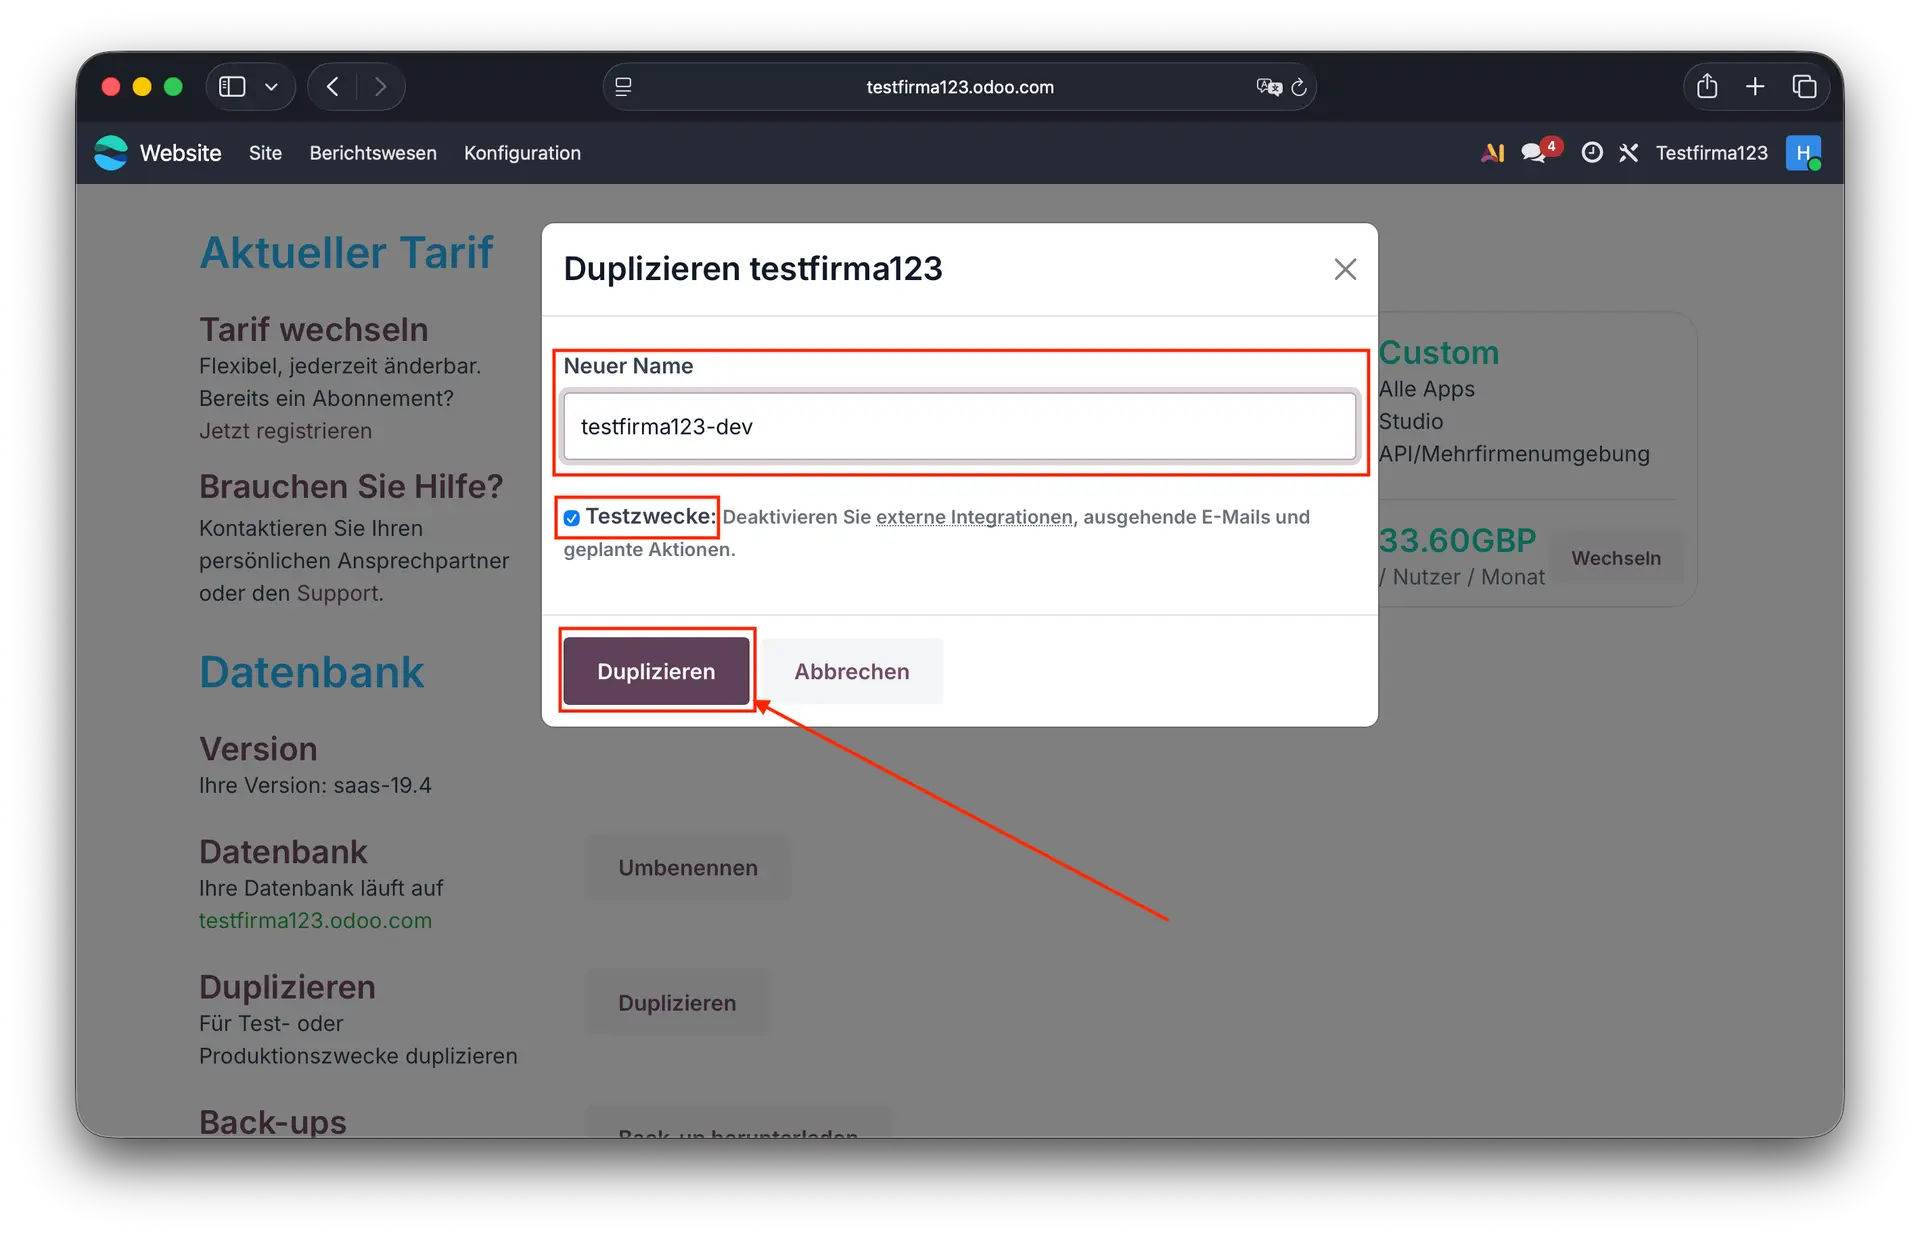
6. Assign names and activate test purpose
A dialog window opens where you can enter a name for the test environment. The format "companyname-dev" has proven effective. Additionally, please check the box for "Test Purpose". This prevents any information from being accidentally sent to customers from the test instance. Then click on "Duplicate".
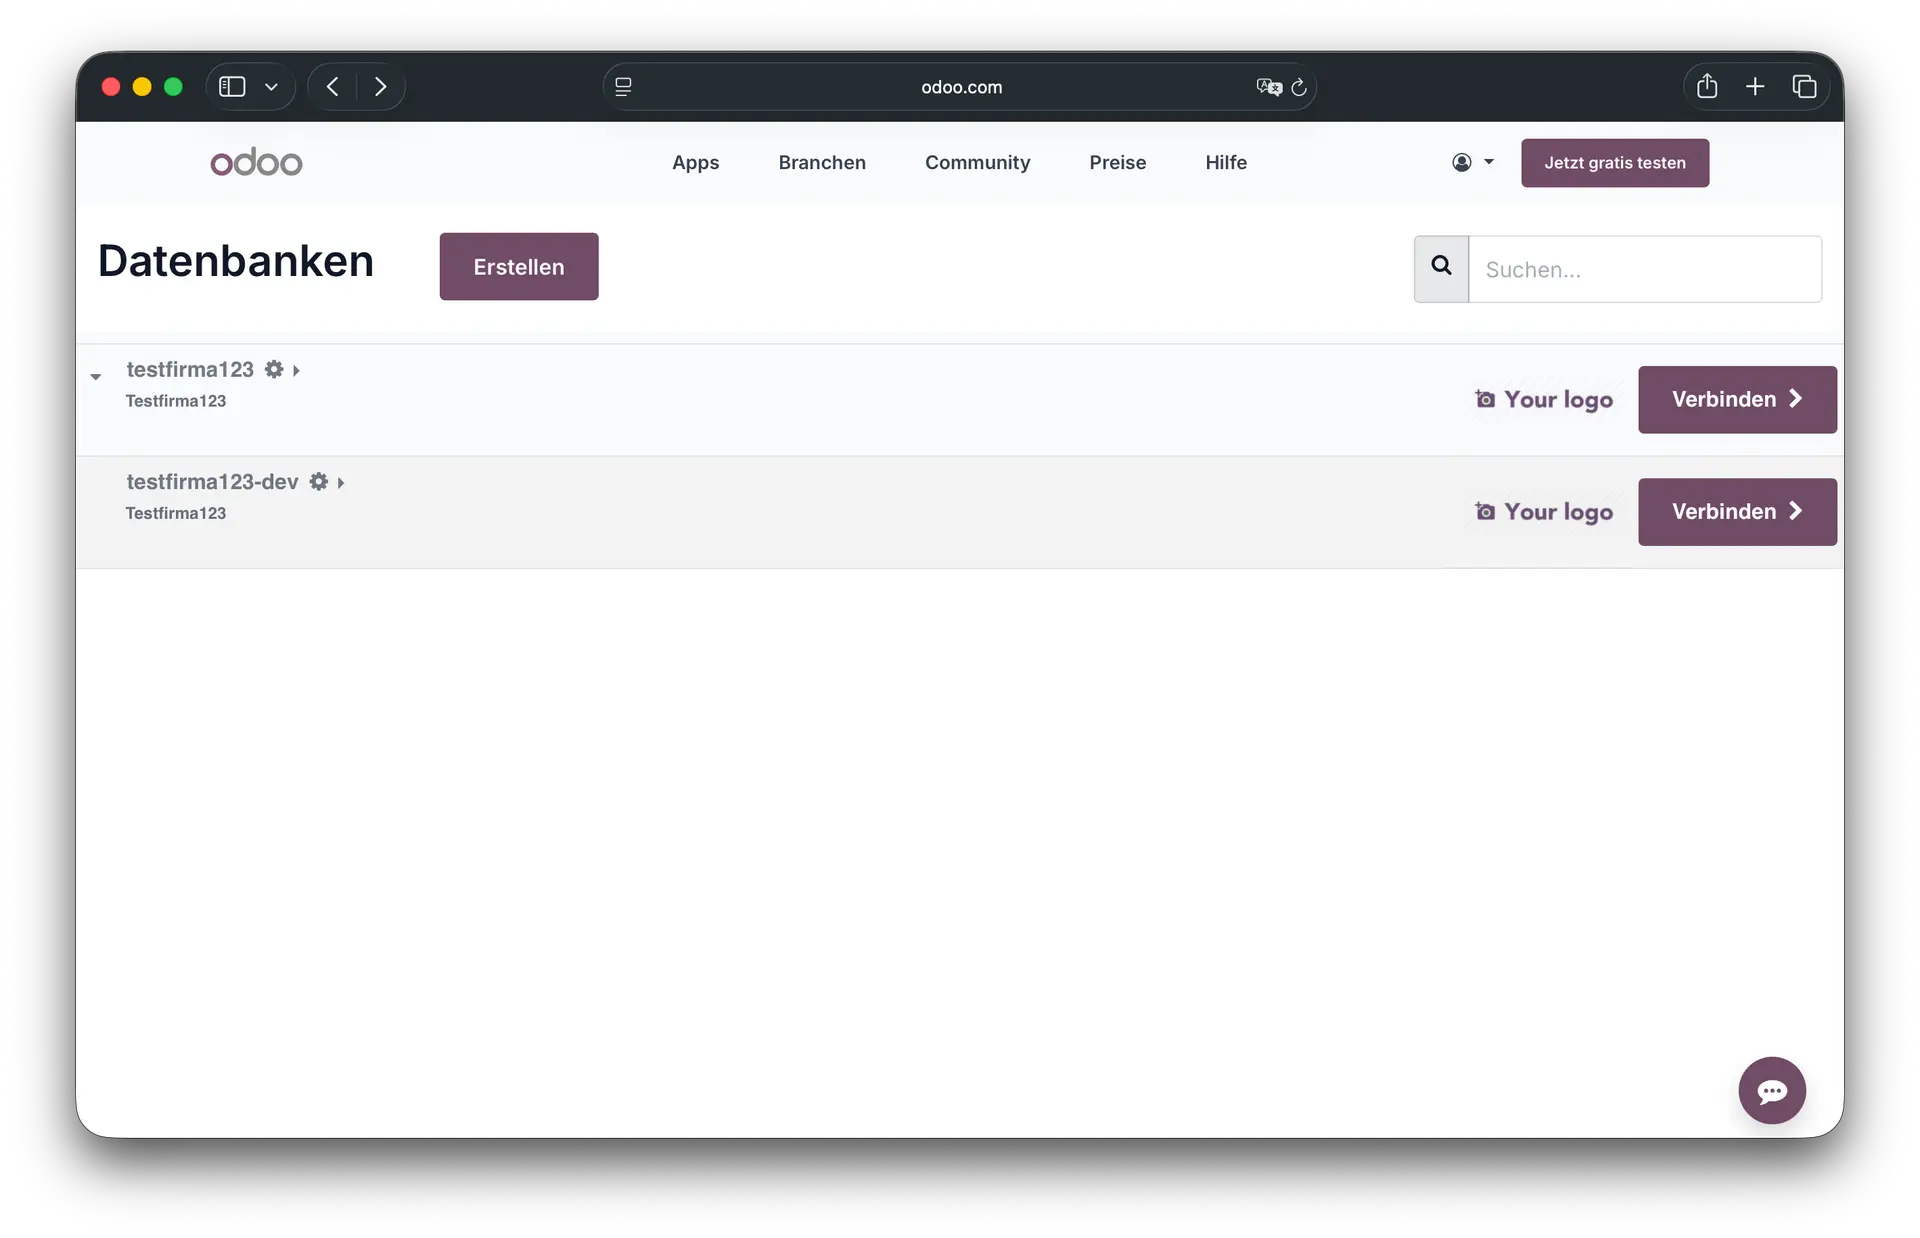
7. Check new database
A new entry should now appear in the overview "My Databases".
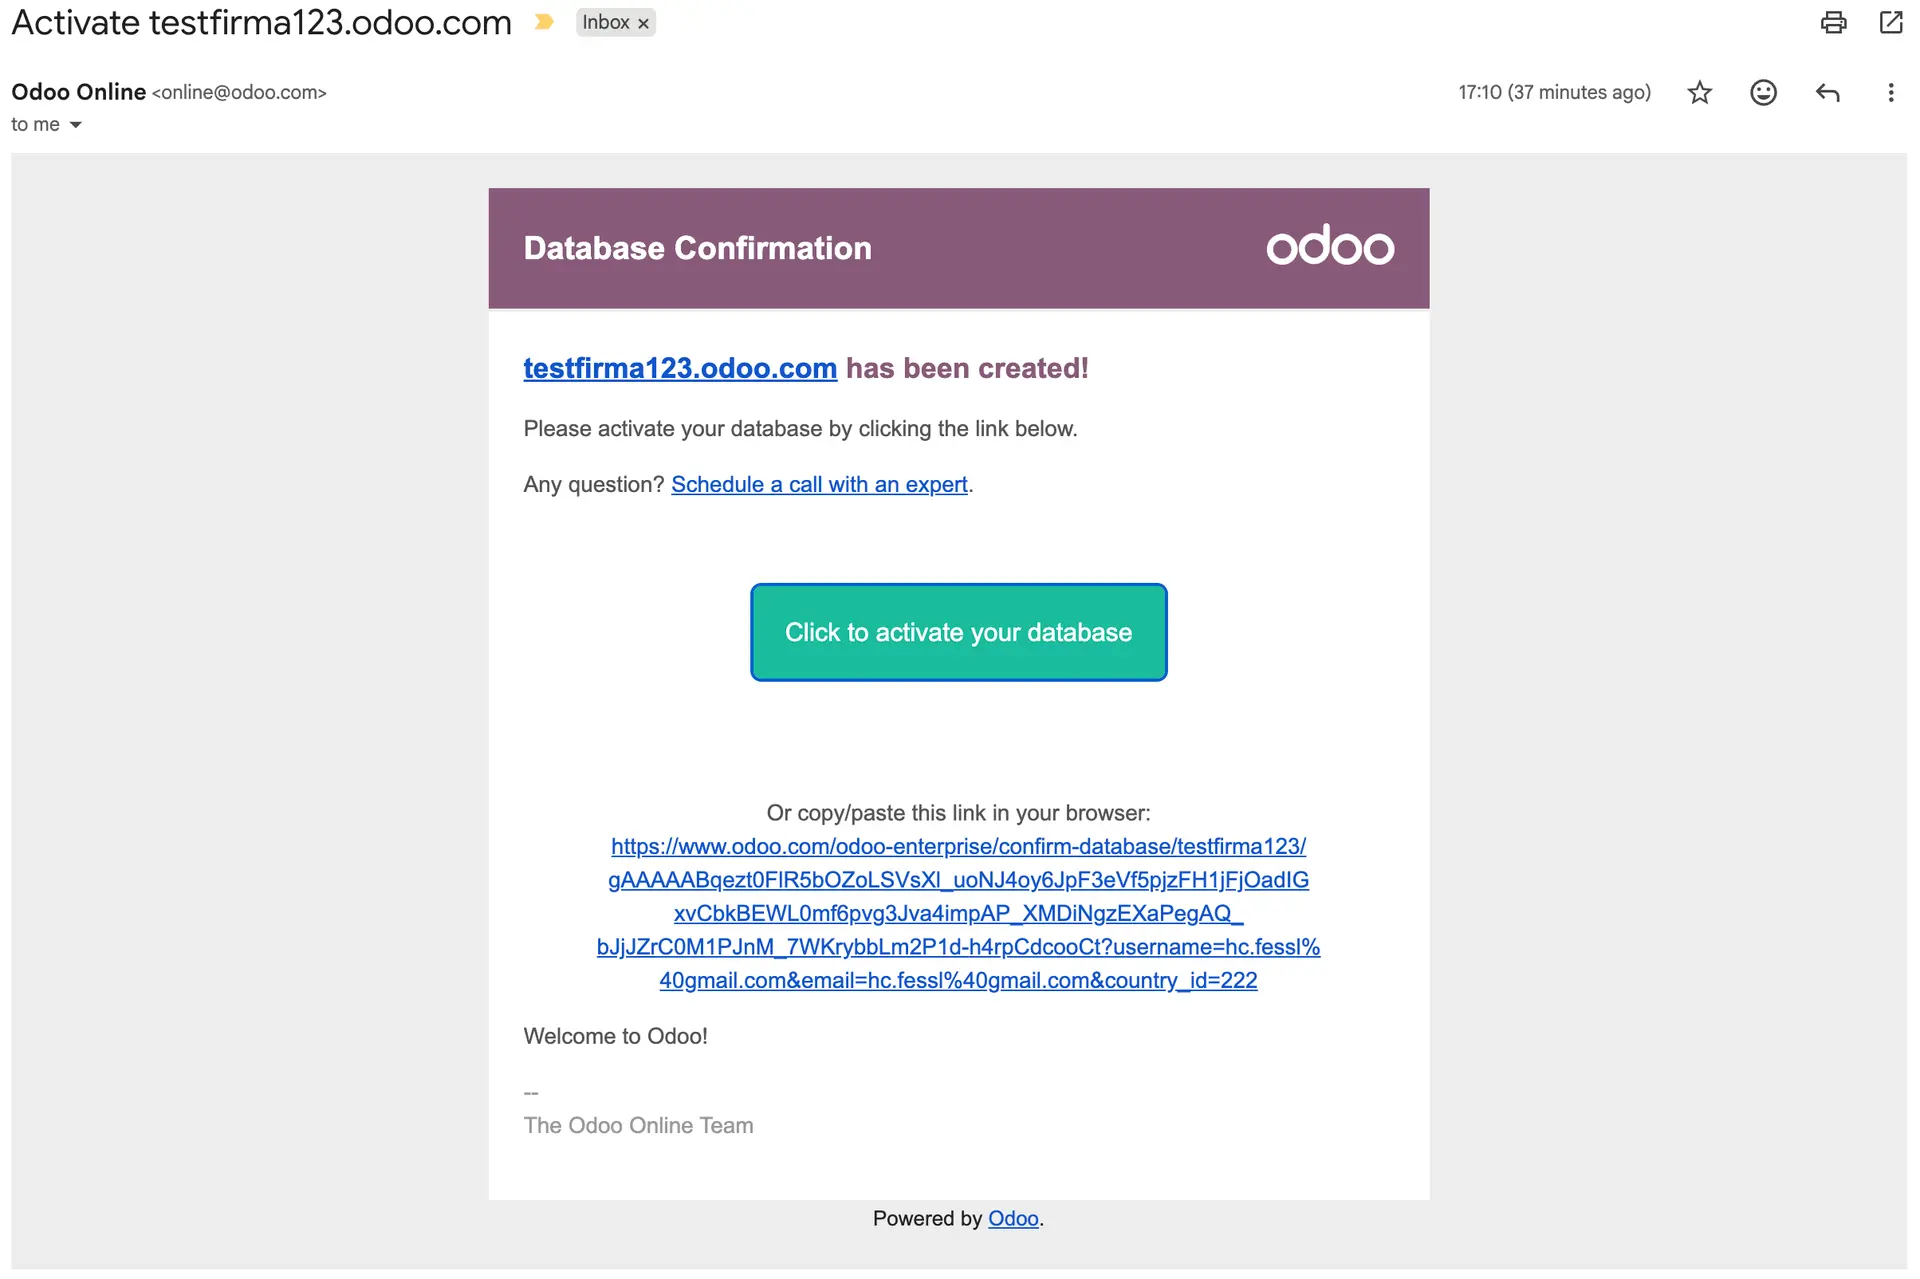
8. Confirm Email
After duplicating, you will receive an email with a confirmation. Be sure to click on the link in this email, as the test database will otherwise become invalid and inaccessible after 3 hours.
9. Set up access for other people
If the development environment is intended not for yourself but for someone else, ensure that this person has an active user account. If an active user account already exists in the production environment, it is also available in the test environment. The other person will then only need the name that was assigned in the dialog window for the test environment.
Do you need support?
If you need support with Odoo, please let us know and get in touch with us.
Cover image: Daniil Komov von Unsplash