Anyone running an Odoo.sh project should not be the only person with full access. Holidays, sick leave, or a change in the team, and suddenly no one can access the project settings, the backups, or the production database. A second administrator is therefore not a nice-to-have, but simply a matter of operational security.
The good news: The process takes no more than two minutes. In this guide, I will show you step by step how to add another administrator to your Odoo.sh project.
Requirements
Before you start, three things should be clarified:
- You are the administrator of the project. Only admins can access the project settings; all other roles do not see this area at all.
- The new person has a GitHub account. Odoo.sh access is managed exclusively through GitHub users; there is no purely email invitation.
- You know the exact GitHub username. Not the email address and not the displayed real name, but the handle from the profile URL, that is, the part after github.com/.
Step 1: Log in to Odoo.sh
Open odoo.sh and click on Sign in at the top right.
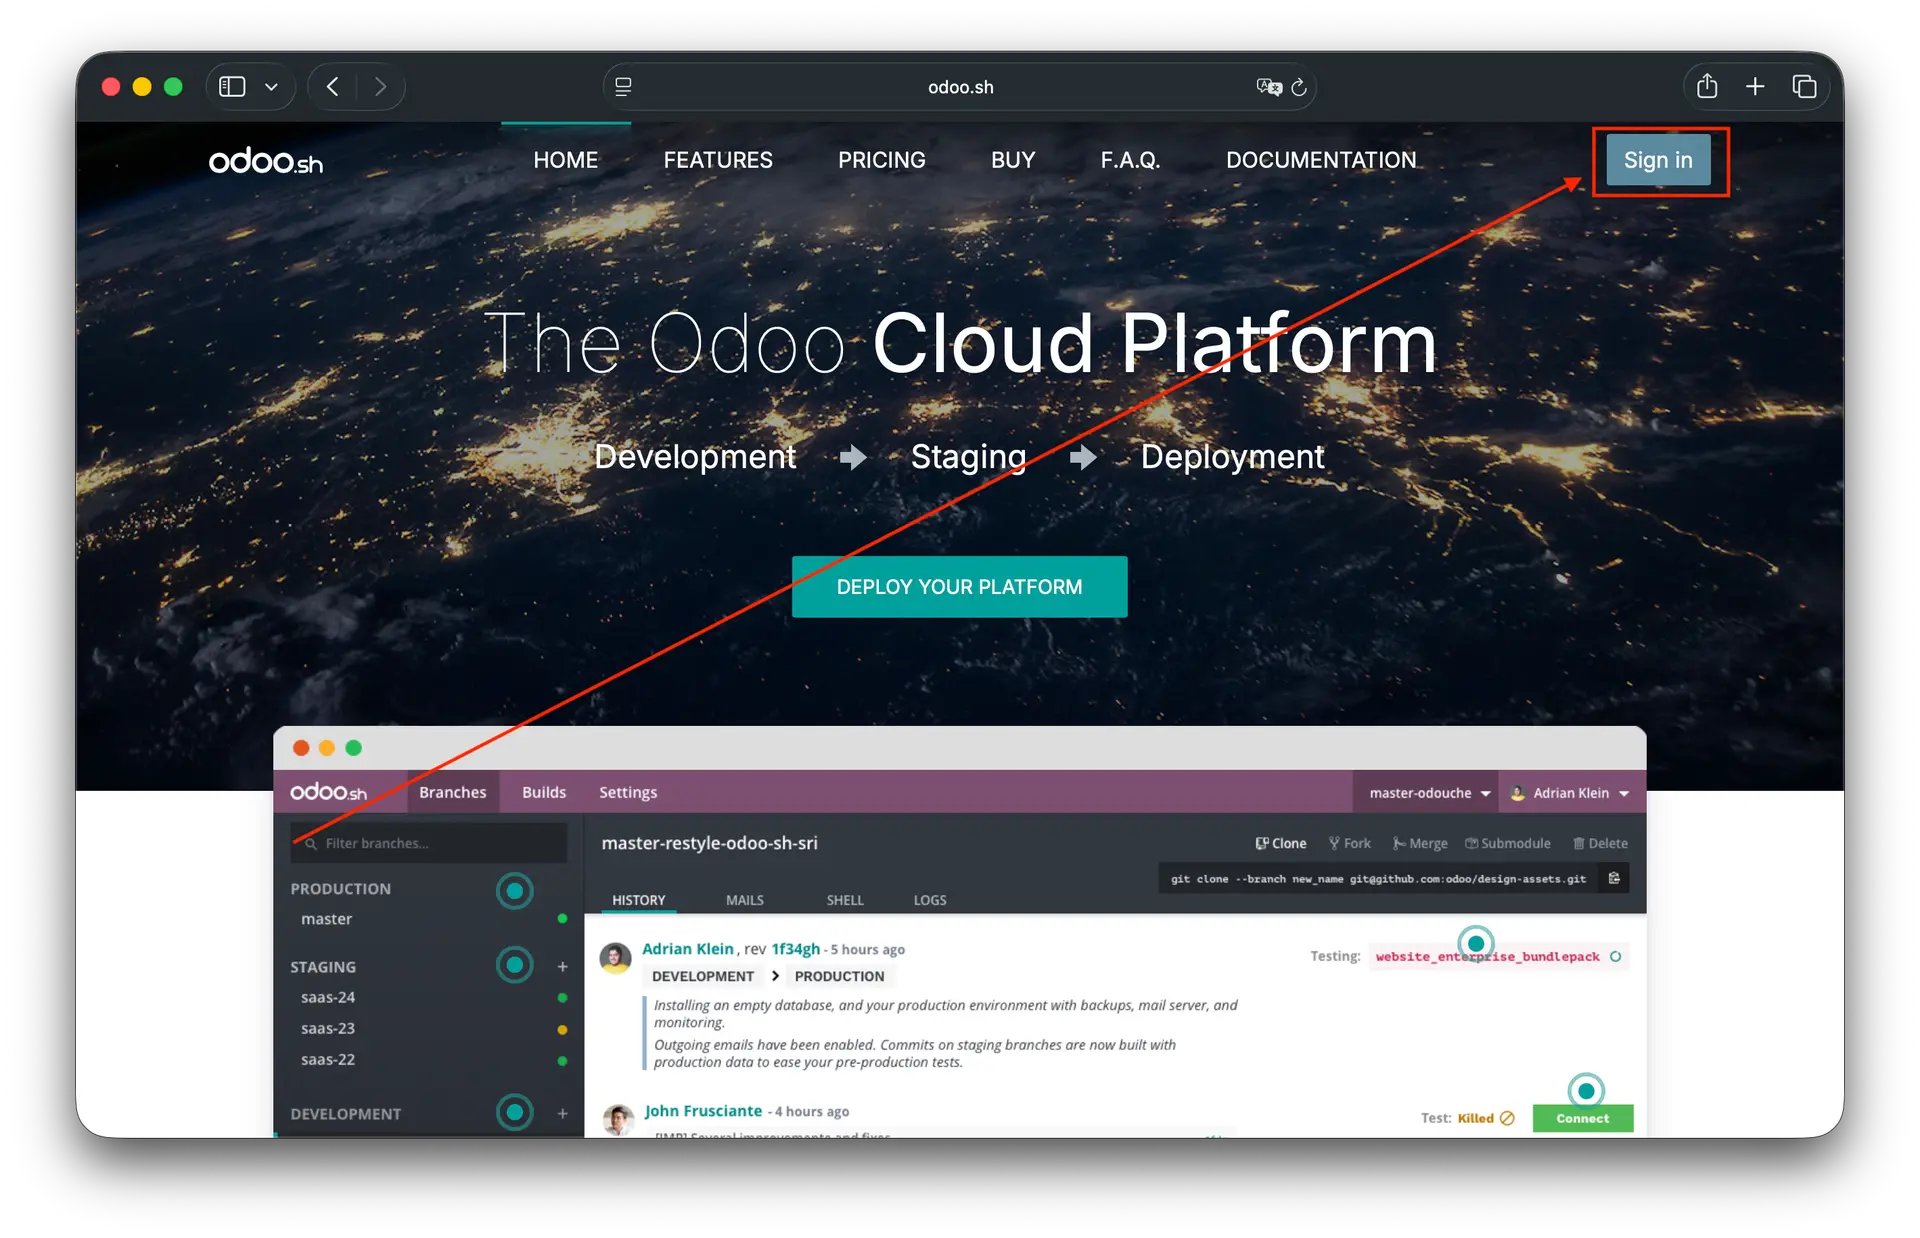
Step 2: Authenticate via GitHub
Odoo.sh redirects you to the GitHub login. The message "to continue to Odoo.sh" indicates that the redirection is correct. Log in with your GitHub credentials, or alternatively via a passkey or through Google or Apple, provided your GitHub account is linked to them.
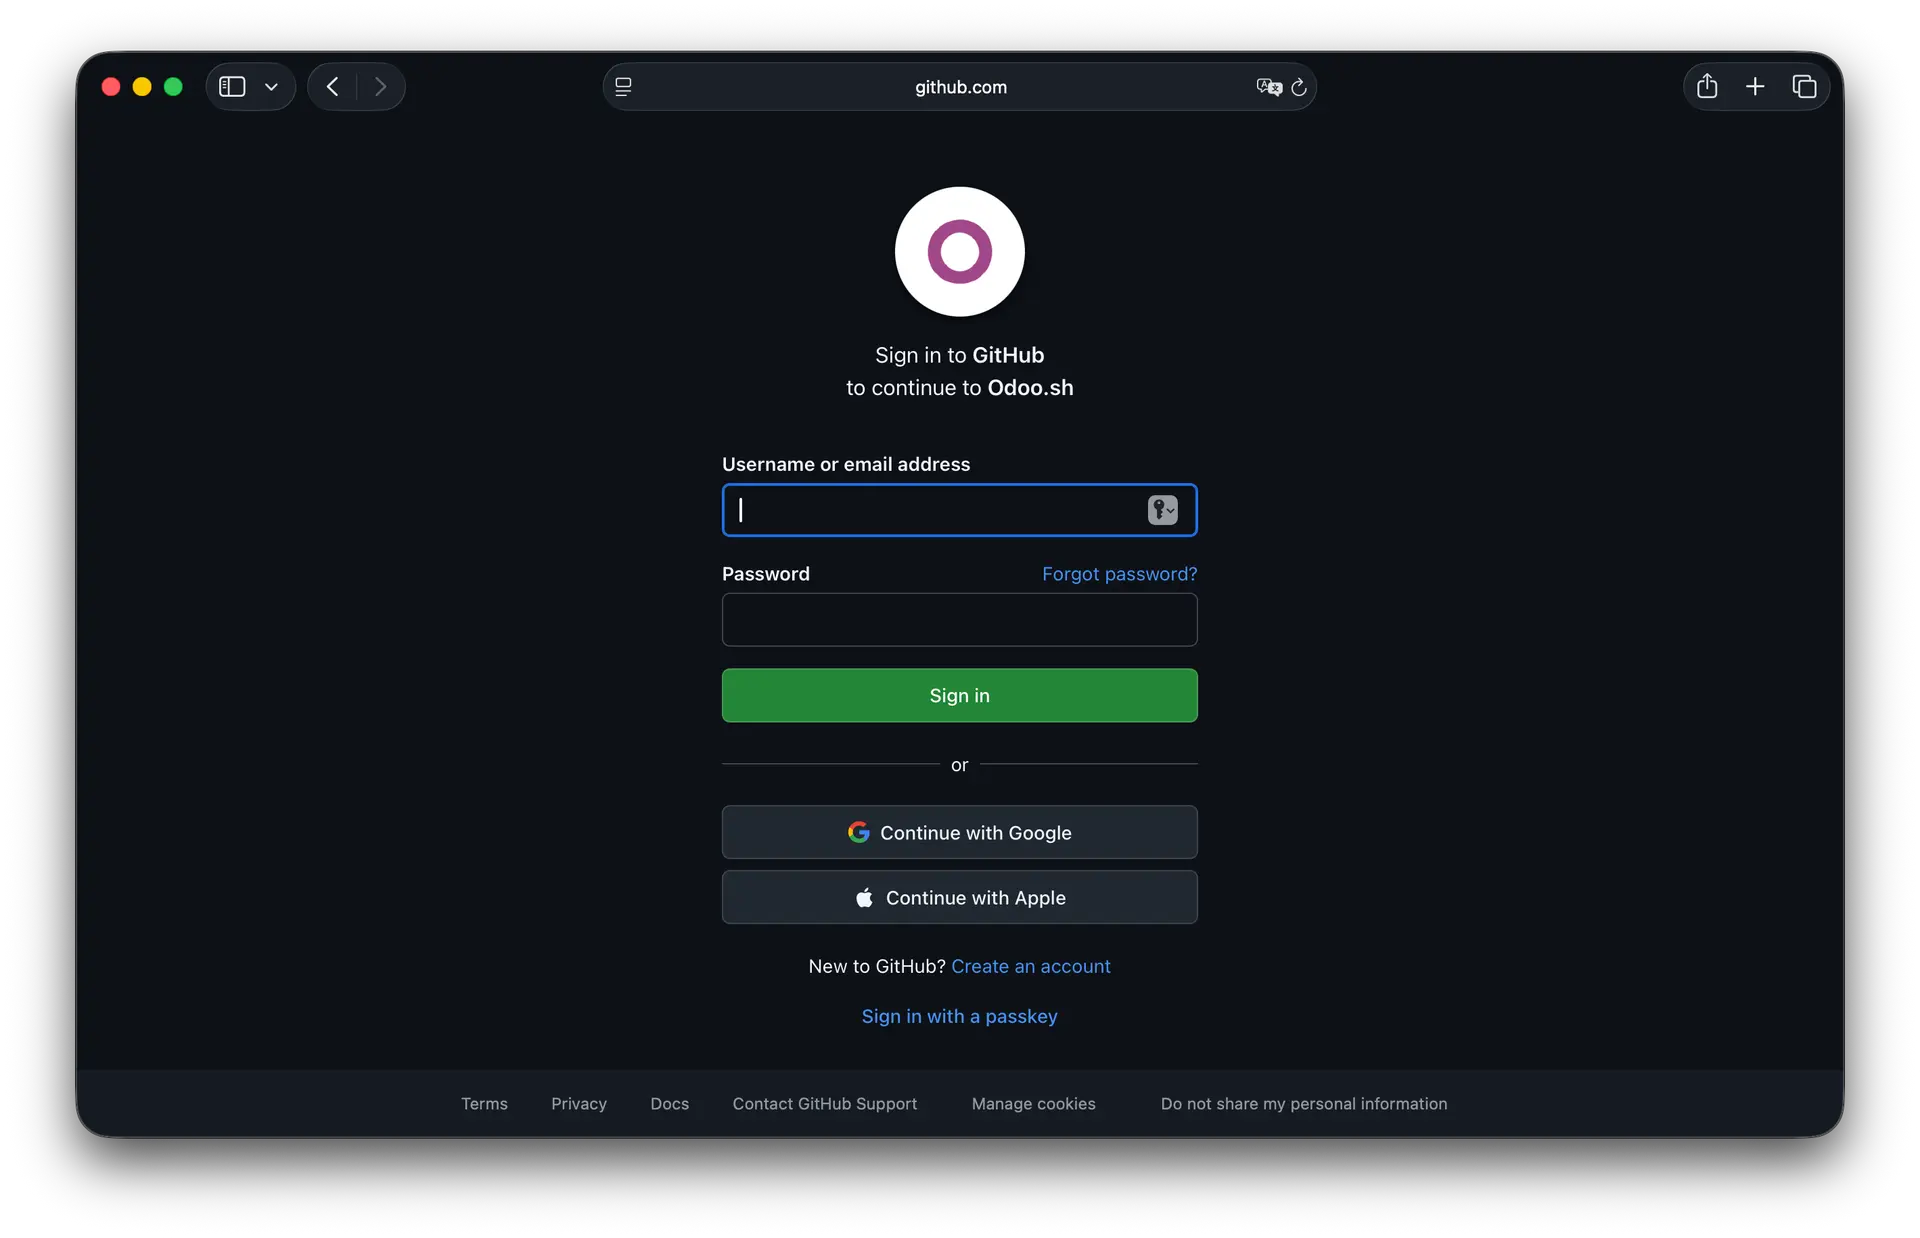
A practical note on the side: If two-factor authentication is enabled for your GitHub account, have your second device ready. If it is not yet active, now would be a good time to enable it, as access to your production environment depends on this account.
Step 3: Open project settings
After logging in, you will land on the overview Your Projects. Each project tile has a toolbar at the bottom. Click on the gear icon there, which opens the project settings directly.
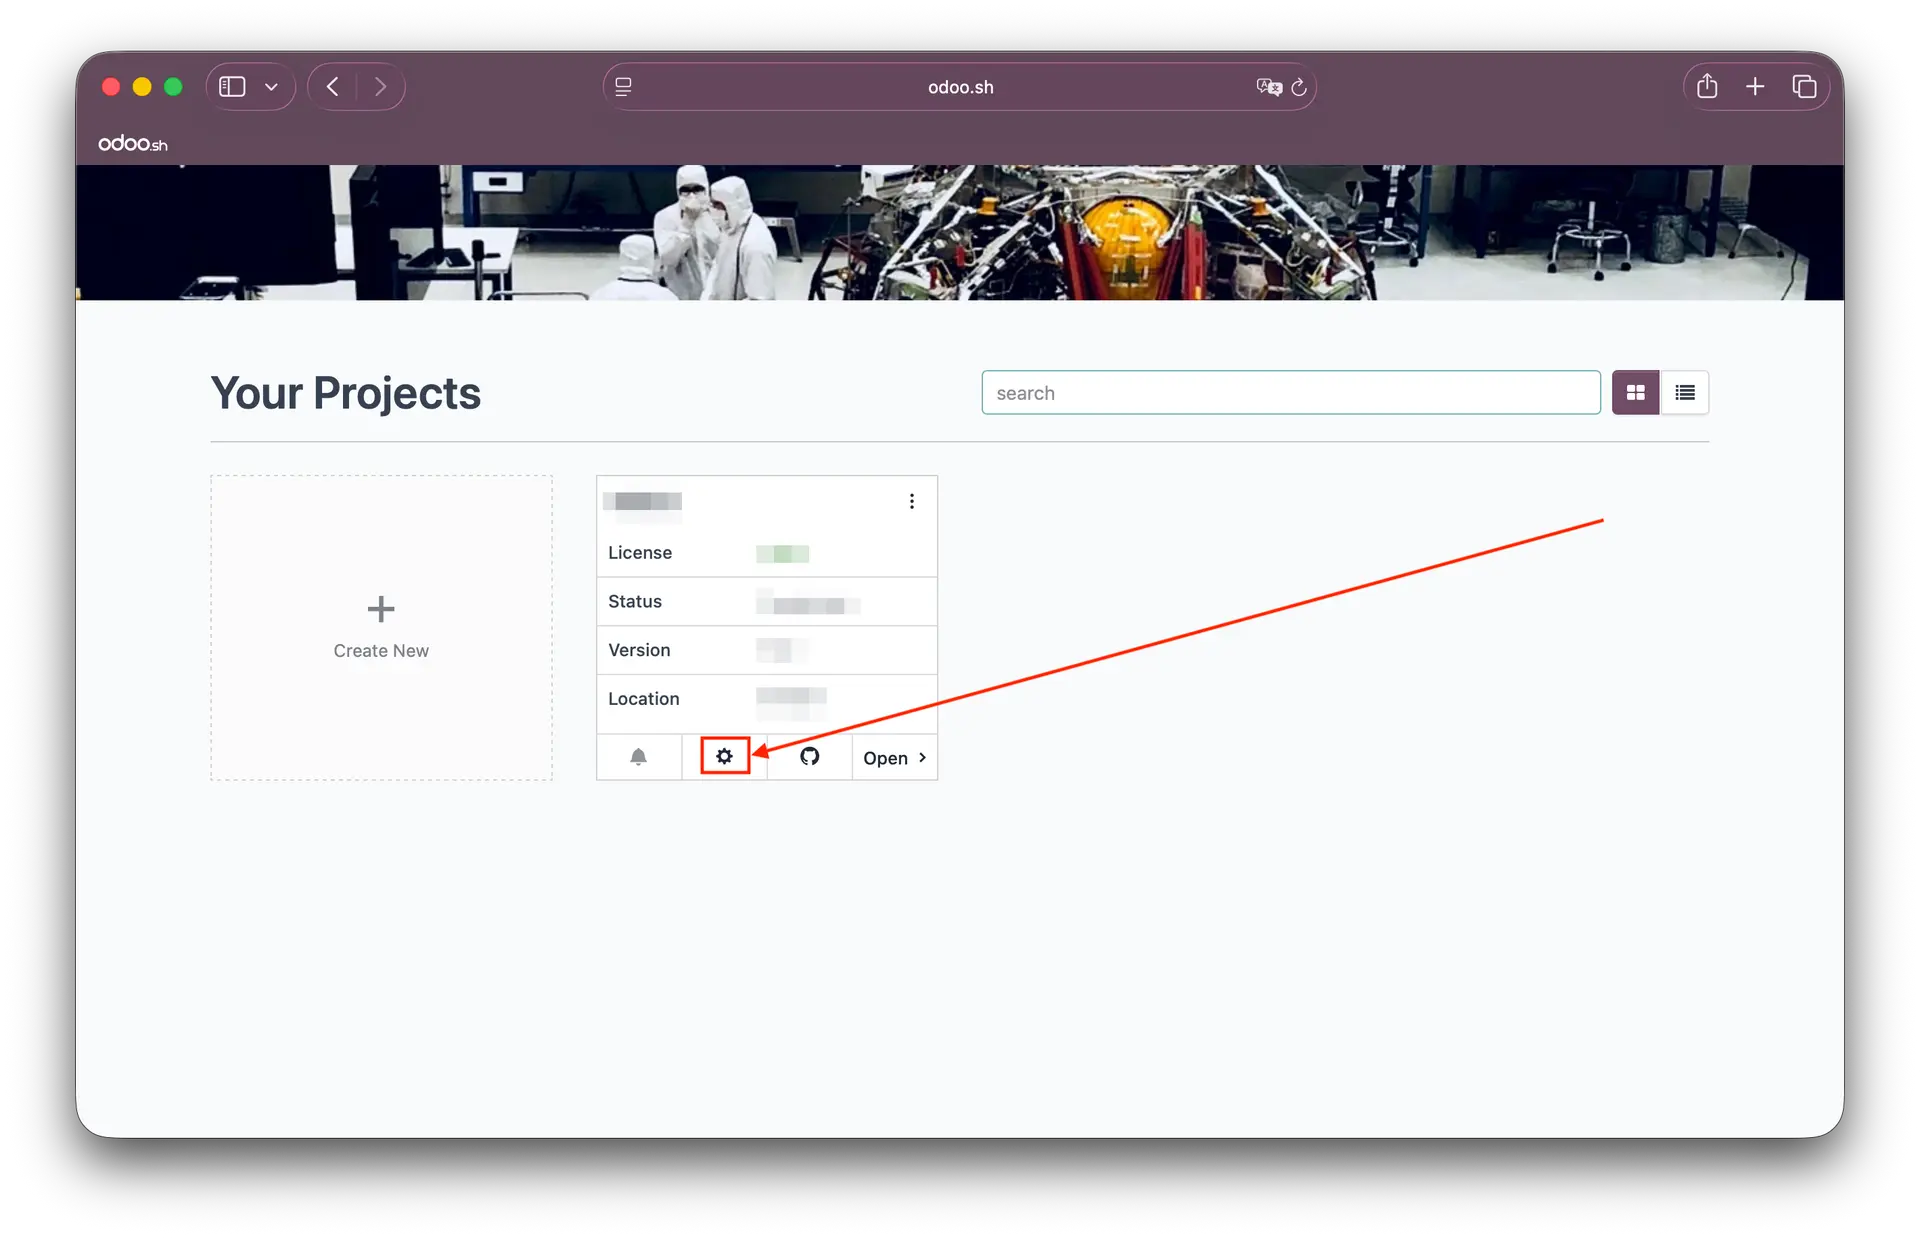
Alternatively, open the project via Open and then switch to the Settings tab in the top navigation. The result is the same.
Step 4: Enter GitHub username
In the settings, you will find the section Collaborators. Enter the GitHub username of the new person in the input field and confirm by pressing Enter.
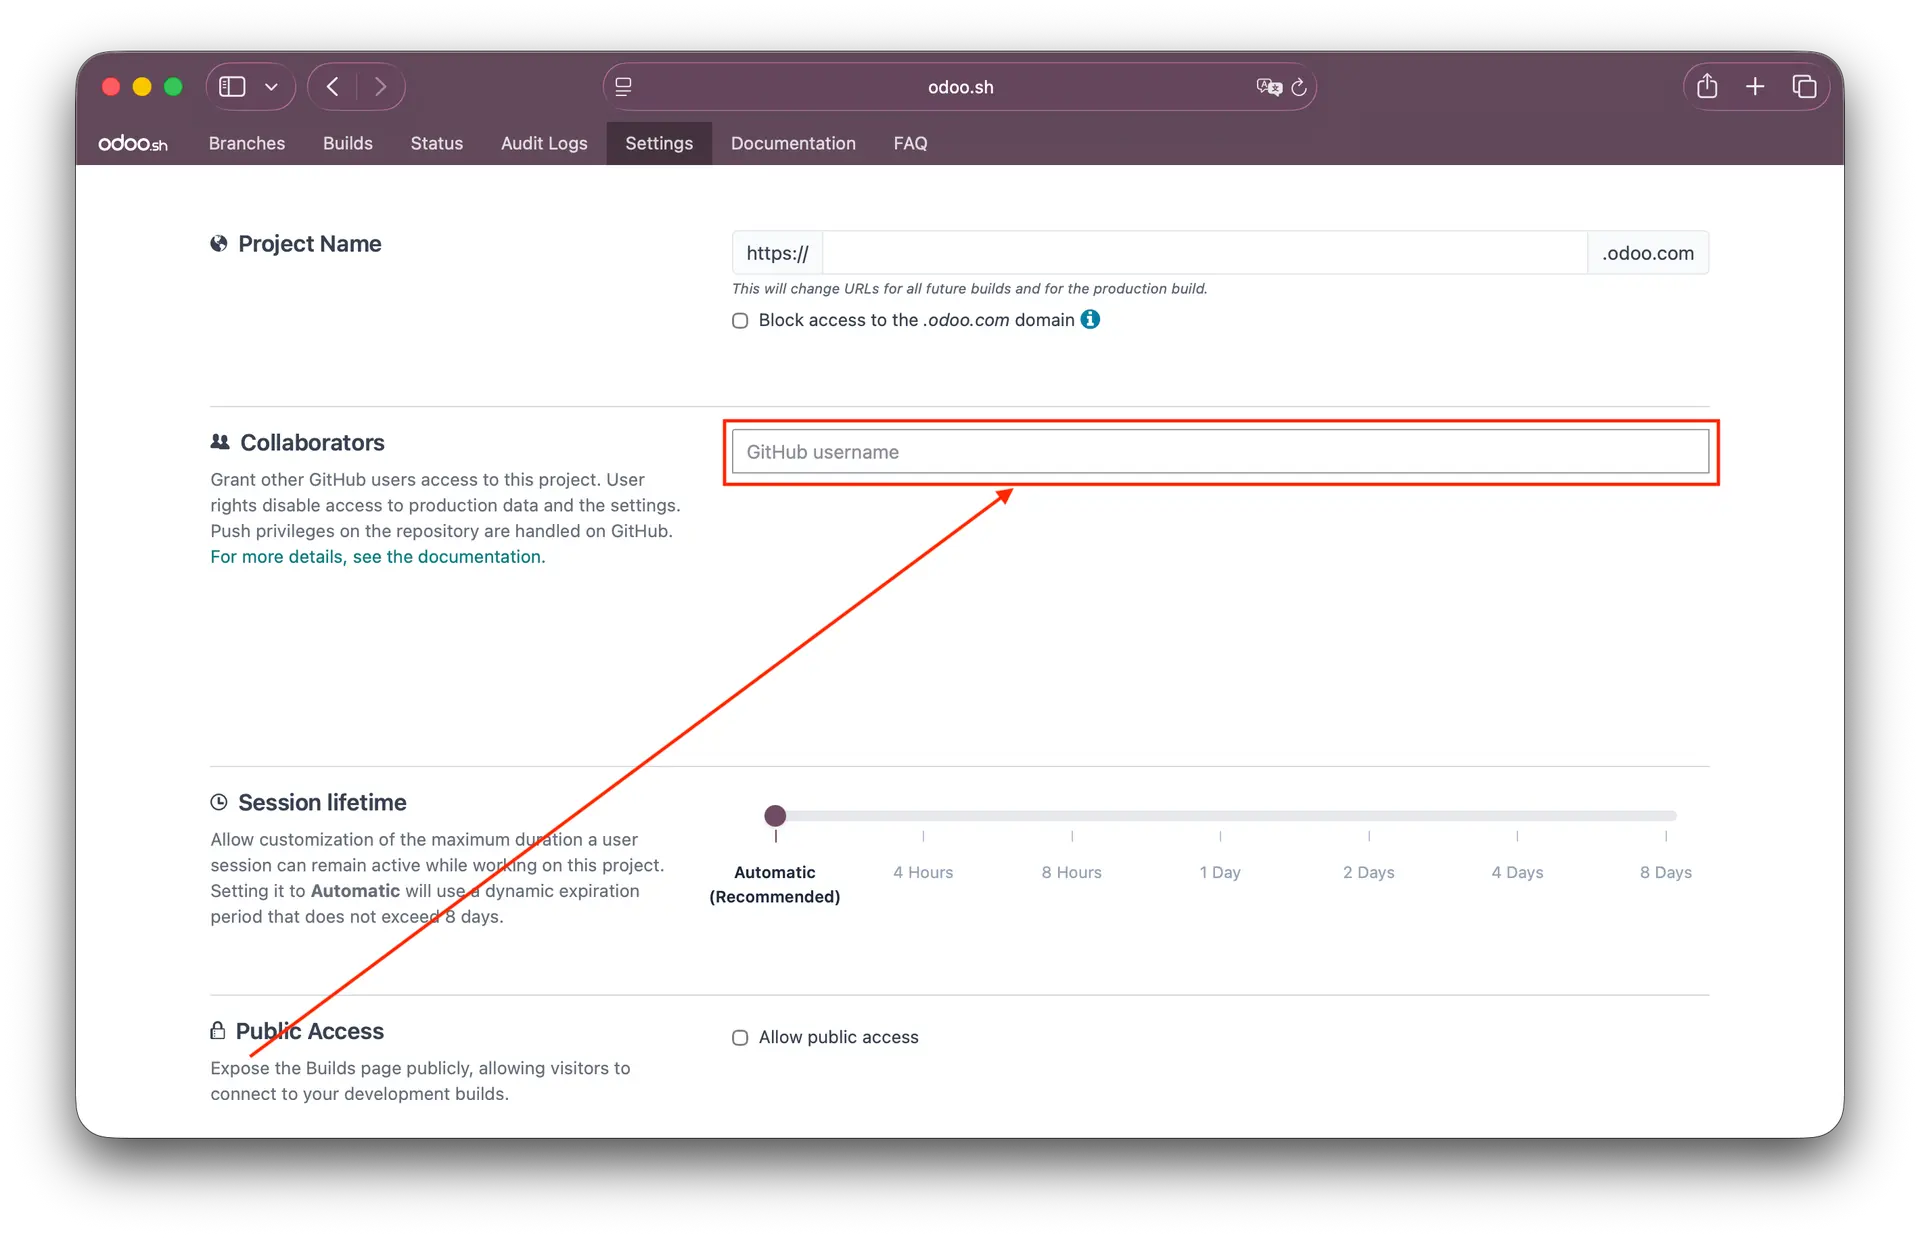
Odoo already points out two important points in the description text: The role permissions control access to production data and settings, and the push permissions to the repository are managed separately on GitHub. More on this below.
Are you working with HCFS GmbH?
Then please enter the following GitHub username here:
derfessl
You can find the associated profile at github.com/derfesslOnly the username derfessl should be entered in the input field, not the full URL.
Step 5: Set role to "admin"
The new entry now appears in the list, by default with the role of Developer. Open the dropdown to the right of the name and select admin.
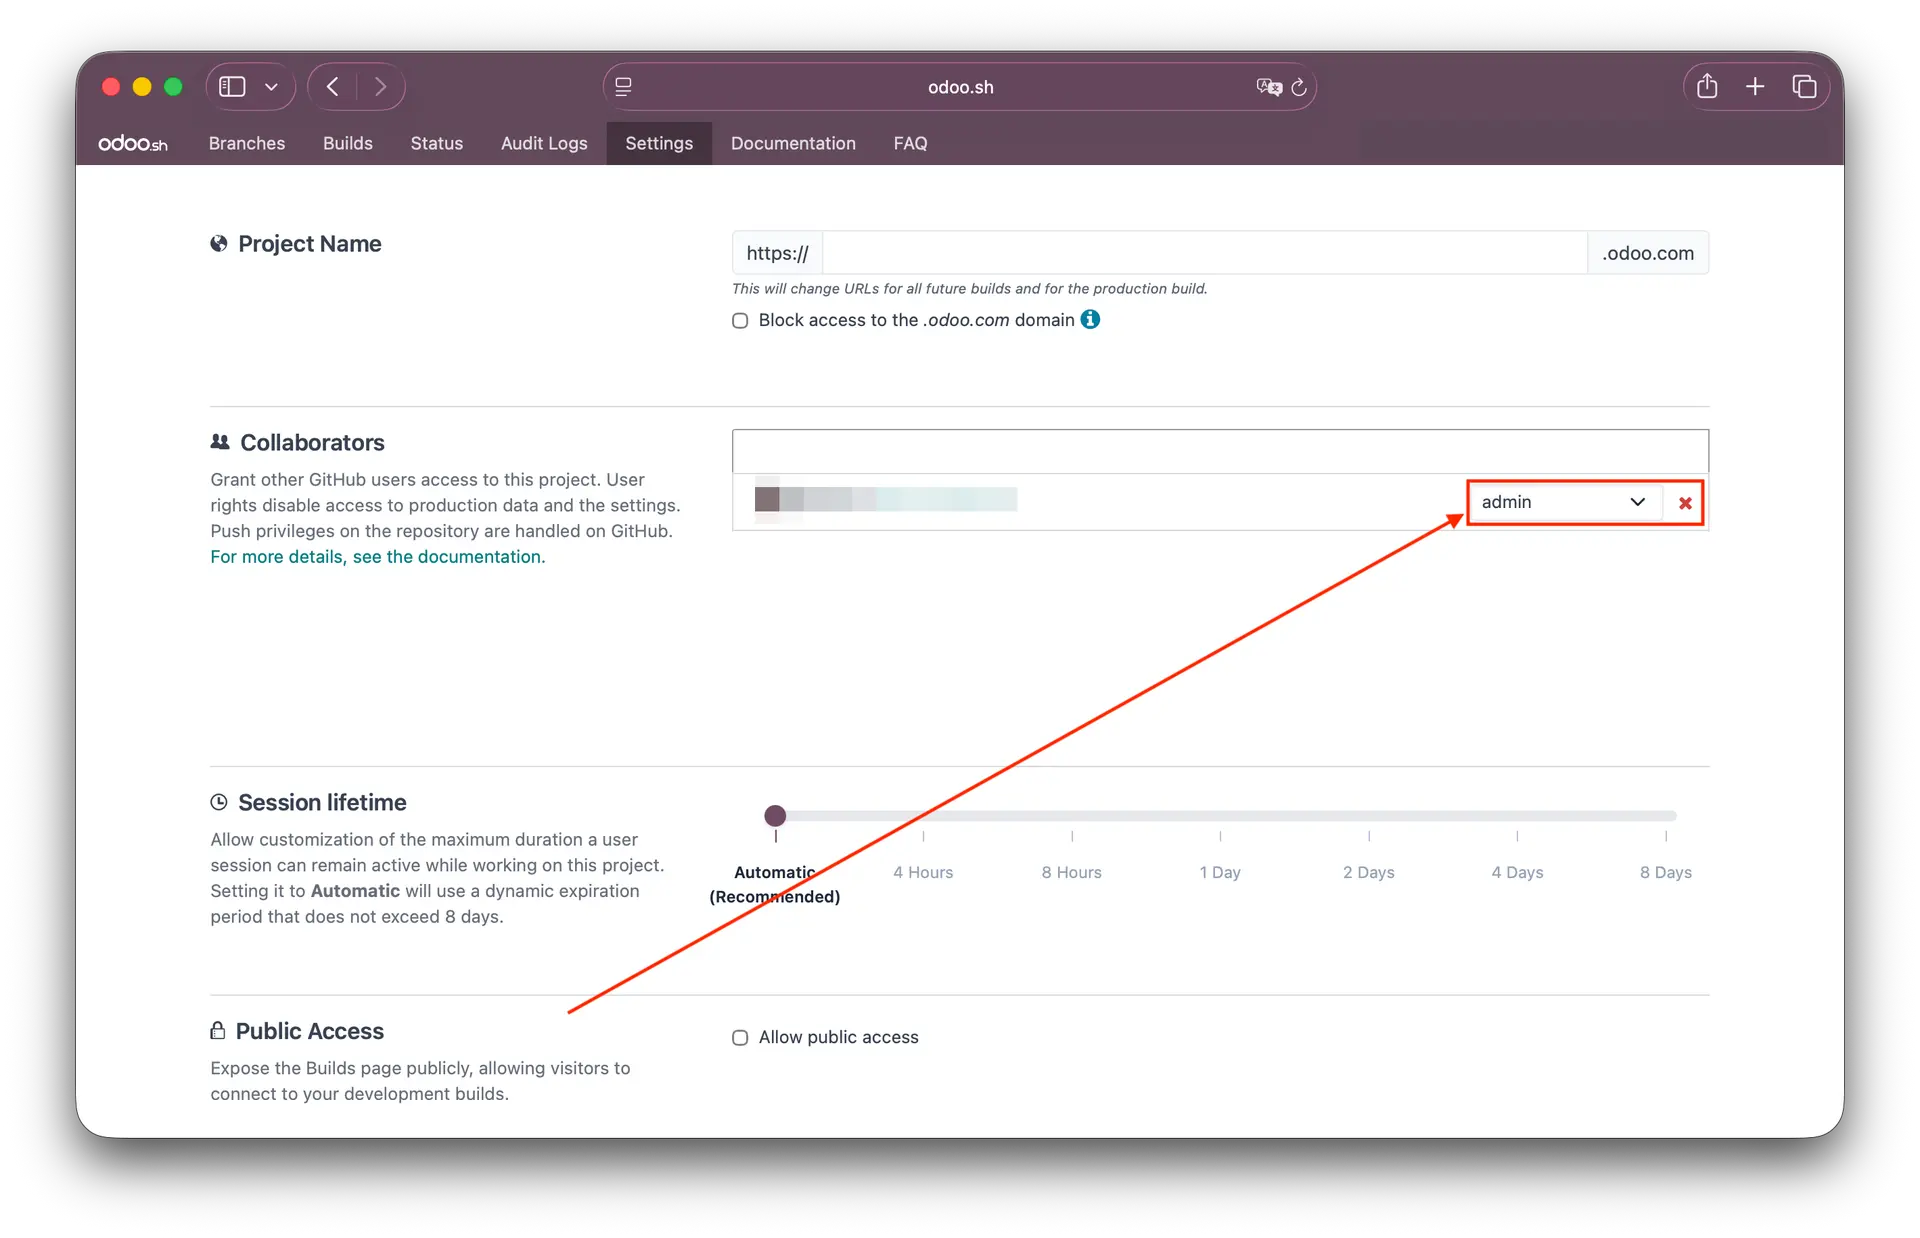
The change is saved immediately, a separate save button is not necessary. Access can be revoked at any time using the red cross next to it.
Done. The person can now log in to Odoo.sh with their GitHub account and see the project in their own overview. It’s best to inform them briefly that the access has been set up.
The three roles at a glance
Odoo.sh has three permission levels. The difference is relevant, as not every person in the team needs full access:
| Role | Access |
| Admin | Full access to all features including project settings and audit logs |
| Tester | Access to staging and development databases, works with copies of the production data, but without access to the production database |
| Developer | Access only to development databases, neither staging nor production |
Important: GitHub permissions are a separate issue
A common misconception in practice: The Odoo.sh role only governs what is possible within the Odoo.sh interface. Who is allowed to push to the linked GitHub repository is decided separately in the repository settings on GitHub.
Conversely, the same applies: Someone with write access to the repository does not automatically become an Odoo.sh collaborator. Both levels should be consciously aligned with each other; otherwise, gaps or unwanted rights may arise.
For productive projects, it is also advisable to implement a Branch Protection Rule on the master or production branch, so that no one accidentally pushes directly to production.
Practical tips from the business
Four-eyes principle instead of lone fighters. At least two admins, but not an unlimited number. Two to three is a good compromise between reliability and control for most projects.
Consider offboarding. Anyone leaving the company or the project will be removed from both places: in the Odoo.sh project and in the GitHub repository. Make sure to include a specific item on your offboarding checklist for this.
Document access. Record who received which role and when, as well as the reasons for it. This will save you a lot of searching during the next audit, and in the context of the GDPR, it is also sensible to provide a clear justification for access to production data.
Utilise audit logs. As an admin, you have access to the project's audit logs. It's worth taking an occasional look, especially after personnel changes.
Conclusion
Creating an additional administrator is technically trivial, but organisationally it is a decision of significance. An admin means full access to production data and settings. Therefore, check beforehand whether an admin is really necessary or if a tester or developer is sufficient for the use case.
And if you are currently the only admin of your project: Get it done today. It takes two minutes and will save you a very unpleasant day in case of an emergency.
Do you need assistance?
If you require assistance with Odoo, please let us know and get in touch with us.
Cover image: Dan Taylor on Unsplash